Portable Radio Setup
Published:
I’ve been wanting to document my portable radio setup for a while, so finally here is that blog post. This is a QRP setup, intended primarily for digimodes on HF.

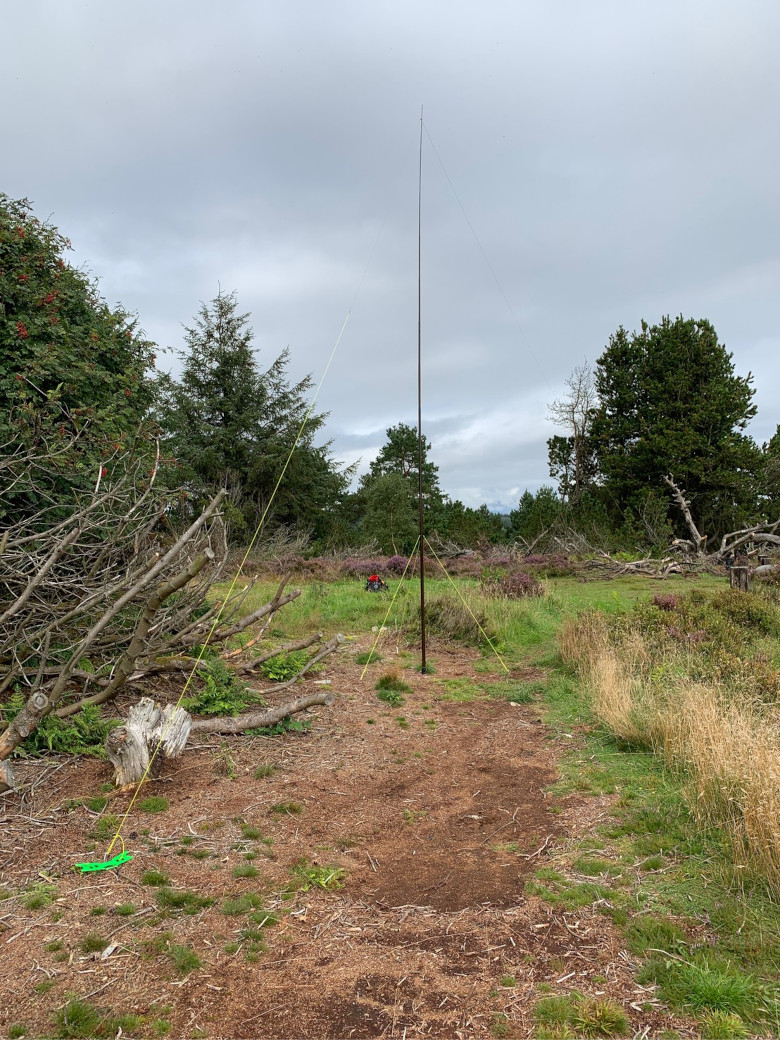
HF antenna set up on Elrick Hill, Aberdeen
First I want to talk about the antenna setup. Pictured above is the antenna set up on Elrick Hill in Aberdeen. I walked straight up the hill last weekend with the kit and had the antenna up in under 10 minutes. The lower guy ropes can be put in without assistance as they are short enough to be able to hold the mast while you push the pegs in. If it had been windier I’d have done those and then I have a second set of guy ropes that go half way between those and the top.
The antenna is the SOTABEAMS Bandspringer Midi, an end-fed antenna good for 10m-60m with a tuner. There’s the wire that goes over the mast and a second wire as a counterpoise that runs along the ground beneath the first wire. I particularly like the wire winder that makes it near impossible to get either the guy ropes or the antenna wires tangled.
The mast is the SOTABEAMS Tactical Mini, a 6 meter fibreglass mast. I’ve had at least 50 hours of use of it so far, and I’ve never had any issues with it. If I do, spares are available to replace any sections that get broken. It’s lightweight and can sit in my backpack nicely (although it pokes out a couple of inches).

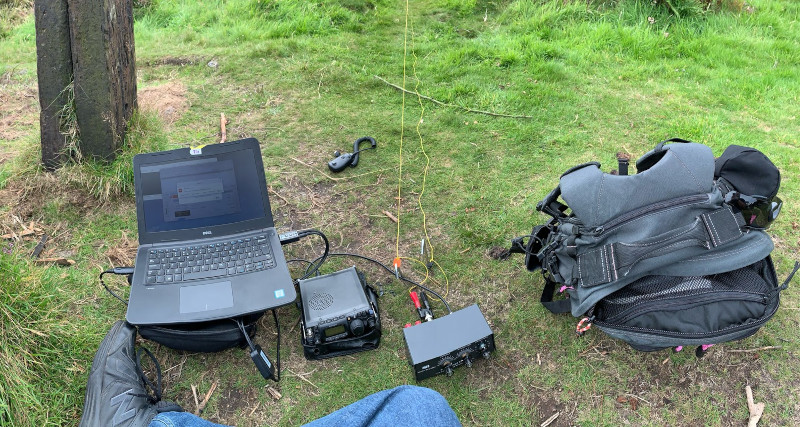
Laptop, Yaesu FT-817, Travel Tuner and connected antenna
The antenna wire and counterpoise both terminate with 4mm banana plugs. These are then connected to an adapter to convert to BNC, which is connected to an adapter to convert to PL259. This part of the setup is not optimal and while the tuner, a MFJ-902H Travel Tuner, does have 4mm sockets on the back I’m not sure how they would work with this antenna or how I should wire them up. If you have ideas for this I’d be interested to hear them.
The tuner is then connected to the Yaesu FT-817ND with a short RG58 patch lead. For now I’m running this from the internal battery (which has just been replaced) but I’m seriously considering investing in an external battery. Hibby has been invesitgating building his own battery packs with lithium ion cells, a route I may go down later too.
Finally, there is a Dell laptop running Debian connected to the radio via a data mode cable. A USB sound card is used as laptops don’t have microphone jacks anymore. On the particular trip in these pictures, the laptop didn’t actually work as there were issues with PulseAudio refusing to emit any sound that I’ll need to investigate more.
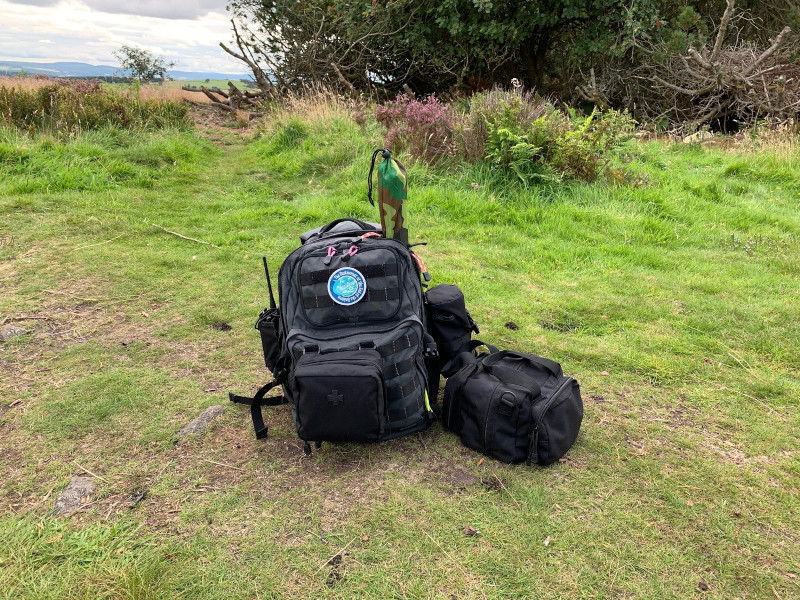
Packing everything away at the end of the day, the mast and antenna sit in the backpack with the laptop. The radio, tuner, connectors, sound card, and data cable are all stored in the kit bag.

RUSH 24 backpack and 5.11 Kit Bag packed away
This post isn’t as comprehensive as I’d have liked, but I’ve not blogged for a while and I figured that writing something was better than waiting for the perfect post to materialise.